A laptop is built for portability — not for sitting at a desk for eight hours straight. Without the right laptop desk setup around it, you end up hunching toward a low screen, typing at the wrong height, and finishing every workday with neck and wrist tension that compounds over time. The good news: a proper laptop desk setup fixes all of this, and it does not have to be expensive or complicated.
This guide covers 20 proven laptop desk setup ideas for every budget, workspace size, and work style — plus ergonomics guidance, essential accessories, and organization strategies to keep your setup working for you long-term. For a broader look at workspace design, see our full desk setup ideas guide.
Laptop Desk Setup Quick Comparison
Not sure which setup is right for you? Use this table to find your starting point.
| Setup Type | Best For | Approx. Cost | Space Needed |
|---|---|---|---|
| Minimalist single screen | Writers, focused workers | $80–$150 | Any size desk |
| Laptop + single monitor | Most remote workers | $200–$450 | Medium desk |
| Dual monitor | Developers, editors, analysts | $400–$700 | Large desk |
| Ultrawide monitor | Power users, creatives | $500–$900 | Medium–large desk |
| Docking station | Hybrid workers | $150–$350 | Any size desk |
| Standing desk | Full-time WFH, health focus | $400–$1,000 | Medium–large |
| Compact / small space | Students, dorm, studio apt | $60–$200 | Small desk |
| Travel-ready portable | Digital nomads, frequent travelers | $100–$250 | Anywhere |
20 Laptop Desk Setup Ideas for Maximum Productivity
1. Minimalist Single-Monitor Laptop Setup
The minimalist laptop desk setup uses a laptop stand, external keyboard, and mouse on a clean surface with zero clutter. This approach works best for writers, designers, and anyone who needs a distraction-free environment. A single focused workspace eliminates decision fatigue and visual noise.
Position your laptop stand at eye level, place your keyboard directly below, and keep only your current task on the desk. Everything else — documents, supplies, cables — gets stored in closed drawers or vertical shelves. The result is a workspace that feels spacious, calm, and ready for deep work. For more on this approach, see our minimalist desk setup ideas guide.
- Adjustable aluminum laptop stand ($30–60)
- Wireless keyboard and mouse ($50–120)
- Cable sleeve or tray to hide all cords ($15–25)
- Wooden desk pad to define your work zone ($30–50)
2. Docking Station Power Setup
A docking station transforms your laptop into a desktop. One cable connects everything — monitor, keyboard, mouse, power, and external drives. This “one-click” setup is perfect for hybrid workers who move between office and home.
With a quality USB-C or Thunderbolt dock, you eliminate cable clutter and can undock in seconds. Your laptop becomes truly portable while your desk stays professionally equipped. This setup works especially well for MacBook and modern Windows laptops with USB-C ports.
- USB-C docking station with HDMI ($50–150)
- Thunderbolt 3 dock for MacBook ($100–200)
- Cable organizer to manage dock cables ($20–40)
- Laptop stand positioned next to monitor for quick switching
3. Dual Monitor Laptop Setup
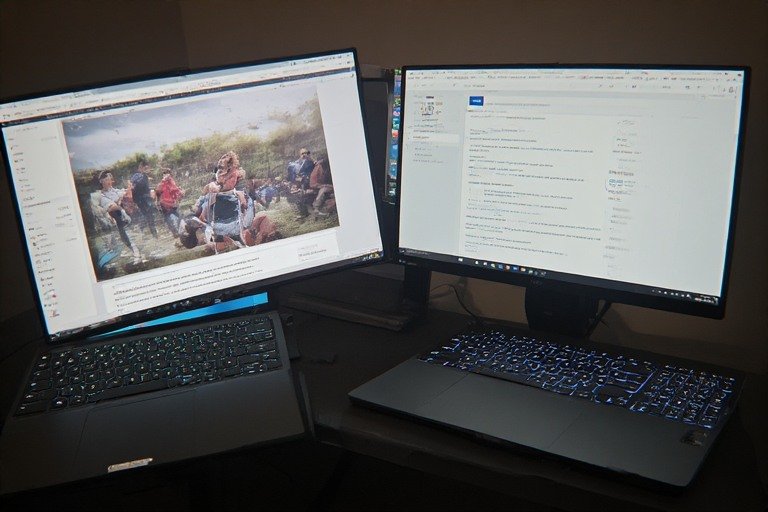
Two external monitors paired with a laptop create a powerful productivity machine. This setup lets you reference documents on one screen, work on another, and keep your laptop as a third display. Developers, video editors, and content creators thrive in this configuration.
Use monitor arms to position screens at eye level, freeing up desk space. Your laptop can sit to the side or closed if using external peripherals. The extra screen real estate reduces window-switching and keeps you in flow state longer.
- Two 24–27″ monitors ($300–600 total)
- Dual monitor arms ($80–150)
- Monitor riser with storage underneath ($50–100)
- Wireless keyboard positioned centrally ($60–100)
4. Ultrawide Monitor Laptop Setup
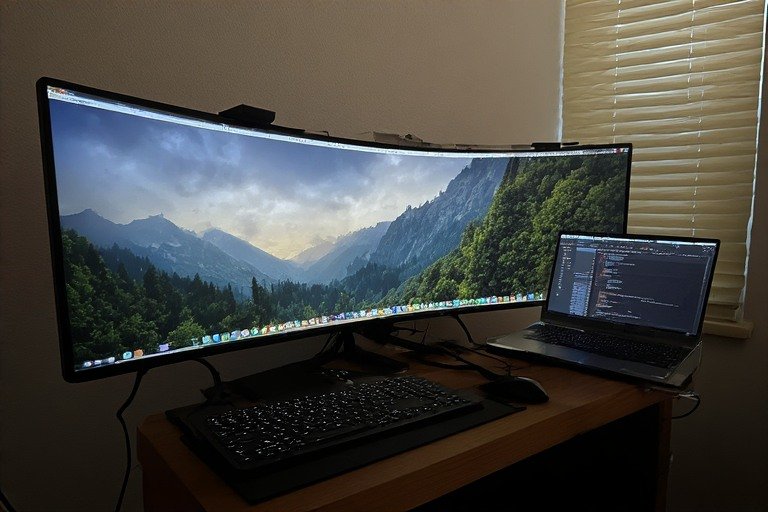
One ultrawide monitor (34–38″) replaces two standard monitors and eliminates the bezel in the middle. This creates a seamless, wide viewing area perfect for spreadsheets, video timelines, and code editing. Setup is cleaner than dual monitors while maintaining ample screen space.
An ultrawide takes up similar desk depth but uses less height than stacked monitors. Pair it with a laptop stand positioned behind for a three-screen effect. The curved edges reduce eye movement and create an immersive working experience.
- 34–38″ ultrawide monitor ($400–800)
- Monitor arm rated for heavier load ($100–200)
- Laptop stand positioned behind ultrawide
- Keyboard tray under desk for optimal positioning ($50–100)
5. Wall-Mounted Laptop Monitor Setup
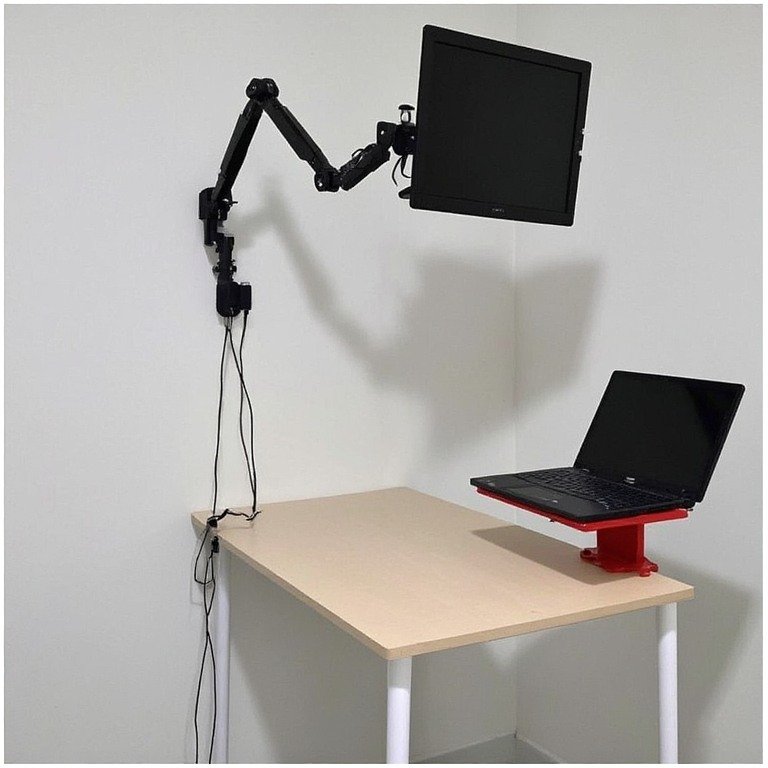
Mount your monitor on an arm attached to the wall, freeing your entire desk surface. This creates a sense of more space and makes cable management easier. Your laptop sits on a simple stand, and everything remains within reach but out of the way.
This setup works especially well in small apartments, dorms, or shared spaces where desk real estate is limited. The wall-mounted approach is also modern and professional-looking — perfect for video calls and Zoom backgrounds.
- VESA-compatible wall mount ($30–80)
- Monitor arm with full articulation ($40–100)
- Wall anchors rated for monitor weight and arm
- Cable management raceway along wall ($15–25)
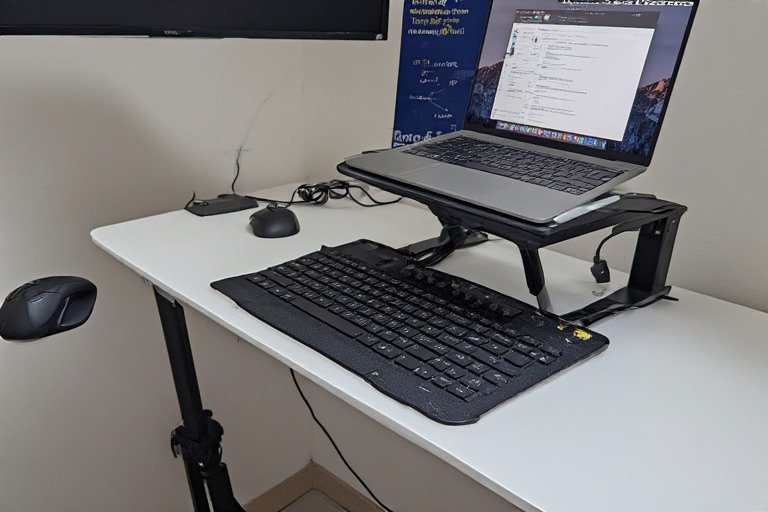
6. Standing Desk Laptop Setup
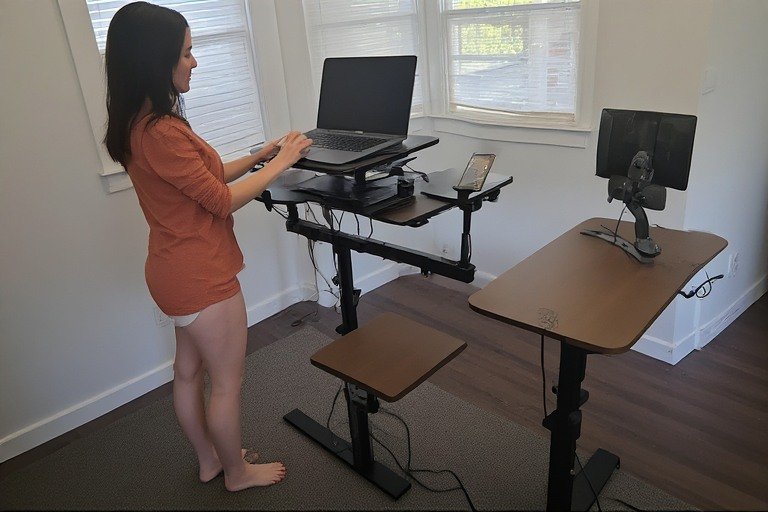
An adjustable standing desk lets you alternate between sitting and standing throughout the day, improving circulation and reducing back pain. Position your laptop on an external monitor arm at standing height, and you have an ergonomic workstation that supports movement.
Standing desks are especially valuable for remote workers who spend 8+ hours at their desk. The ability to change posture every hour keeps energy up and prevents the stiffness that comes from prolonged sitting. Our work from home desk setup guide covers standing desk options and ergonomic principles in detail.
- Electric standing desk ($300–800)
- Anti-fatigue mat for standing periods ($50–120)
- Monitor arm on desk for height adjustment
- Stool for active sitting during transitions ($60–150)
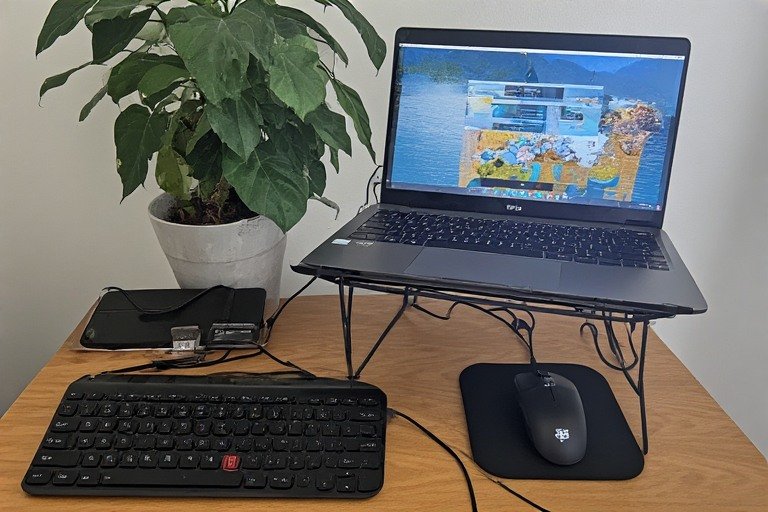
7. Compact Laptop Setup for Small Spaces
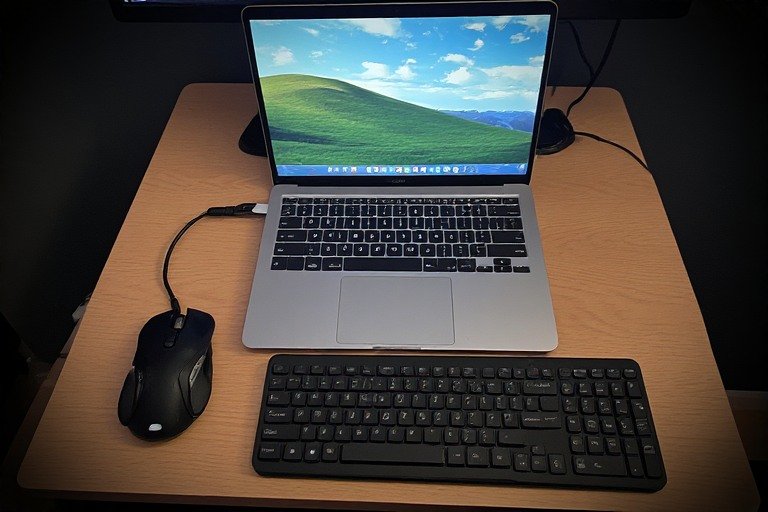
Limited space? A laptop-only setup on a small desk works beautifully when done intentionally. Use your laptop’s built-in keyboard and trackpad, or add a slim external keyboard and mouse. No monitor, no clutter — just your laptop and essentials.
This setup suits dorm rooms, studio apartments, and anyone who values maximum mobility. For extended sessions, pair your laptop with a simple stand to raise the screen to eye level and reduce neck strain. See our small desk setup ideas guide for more space-maximizing strategies.
- Adjustable laptop stand ($20–40)
- Slim wireless keyboard ($30–60)
- Compact trackpad or small mouse ($20–50)
- Lap desk or portable riser for mobility
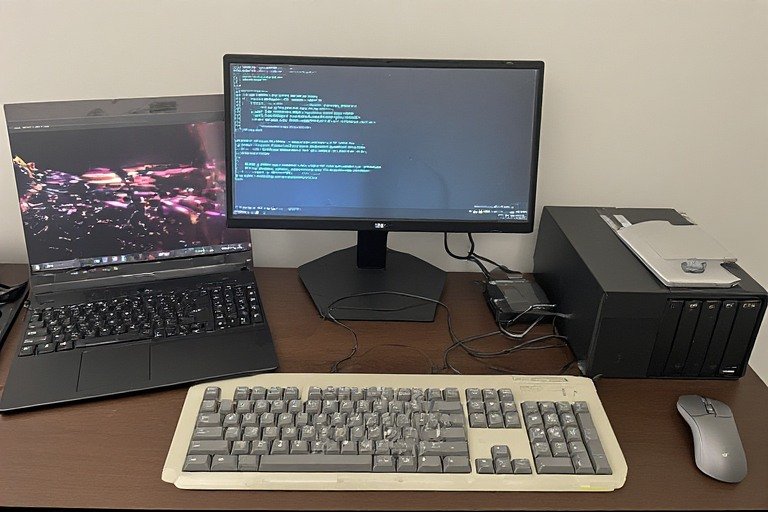
8. Laptop Stand + Single Monitor Hybrid
A laptop stand positioned beside a single external monitor creates a two-screen setup without taking up much space. Your laptop sits at eye level, monitor is to the side, and you have flexible screen real estate for reference materials and main work.
This is the sweet spot for most professionals — not minimalist, but not overwhelming. Perfect for writers who reference documents, customer service reps who monitor emails, or analysts who cross-reference data.
- Laptop stand ($30–60)
- Single 27″ monitor ($200–400)
- Monitor arm to adjust height and angle ($40–100)
- External keyboard and mouse ($80–150)
9. Corner Desk Laptop Setup
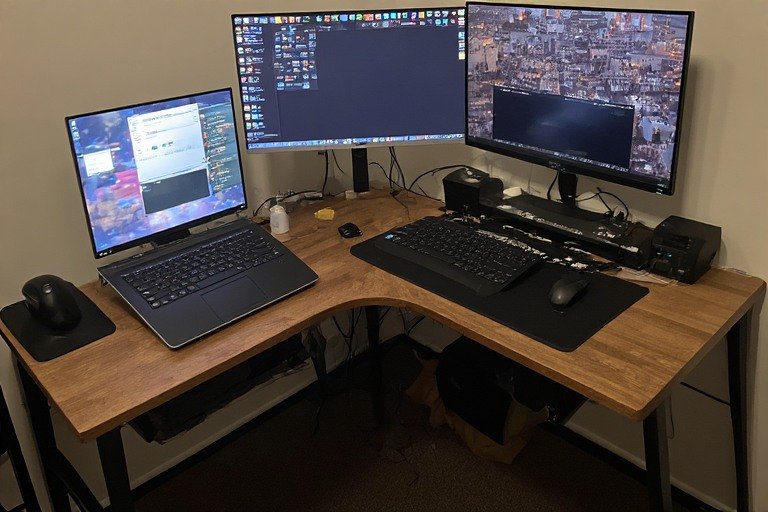
An L-shaped corner desk provides ample space for both a laptop and external monitor without taking up the entire room. Use one section for your primary laptop setup and the other for secondary tasks, storage, or equipment. This layout works in bedrooms, offices, and living rooms.
Corner desks are space-efficient and create a defined work zone. Pair with a docking station for one-cable simplicity, and you have a professional setup that looks intentional. See our clean desk setup ideas guide to keep your corner workspace organized.
- L-shaped desk ($150–400)
- Monitor on one side, laptop on other
- Cable tray under desk for organization ($20–40)
- Task lamp positioned to avoid glare
10. Floating Desk Laptop Setup
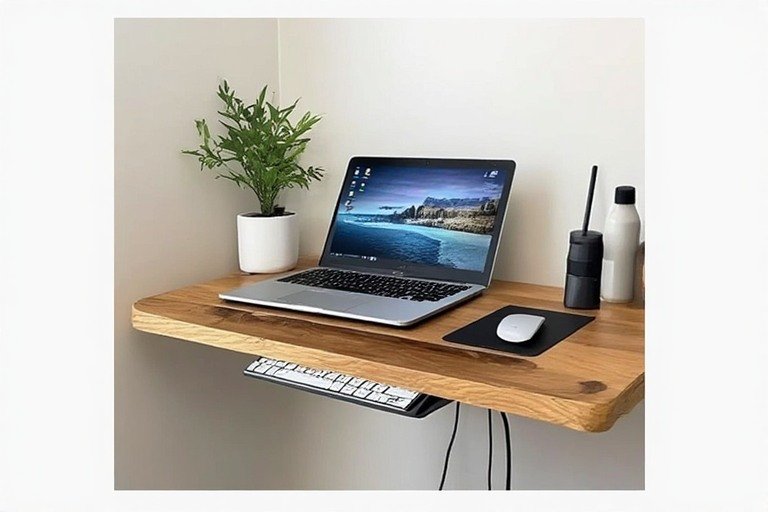
Wall-mounted floating desks save floor space and create a modern, minimalist look. Your laptop sits on the floating surface with room for a monitor and keyboard. The open space underneath makes cable management easy and keeps the room feeling spacious.
Floating desks work in bedrooms, dorms, and small offices. Pair with wall-mounted shelves above for storage that does not eat into desk space.
- Floating desk ($80–200)
- Wall anchors rated for desk and equipment weight
- Floating shelves above ($30–60 each)
- Monitor arm attached to wall or desk
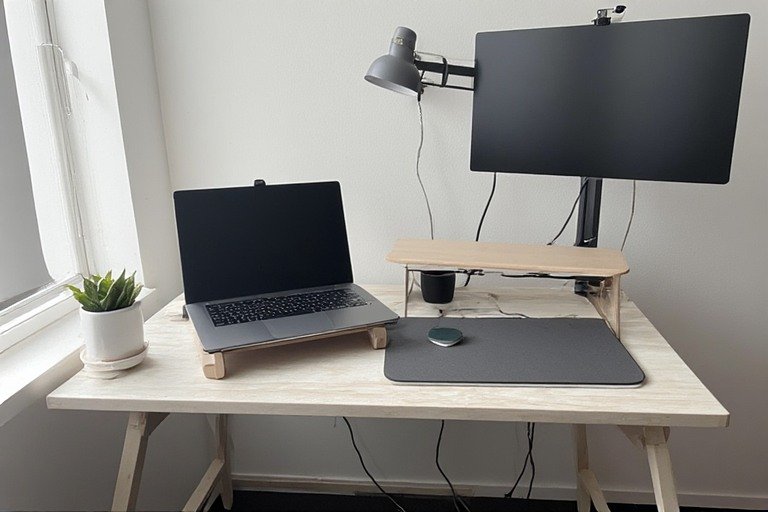
11. Natural Light Laptop Setup
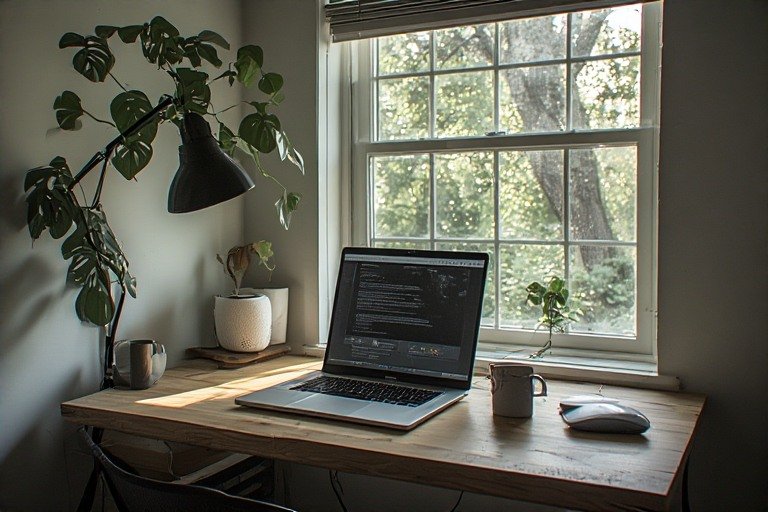
Position your desk perpendicular to a window to maximize natural light without glare on your screen. Natural light boosts mood, reduces eye strain, and increases alertness. This setup works anywhere as long as you have window access.
Natural light also makes your workspace look better on video calls. Pair with a simple laptop stand and monitor arm, and you have a setup that feels energizing and healthy. For style ideas that leverage natural light, see our aesthetic desk setup ideas guide.
- Position desk 90° to window — light without glare
- Anti-glare screen protector if needed ($15–30)
- Minimal window coverings to preserve light
- Small plant on windowsill for life and air quality
12. Gaming Laptop + Work Setup Hybrid
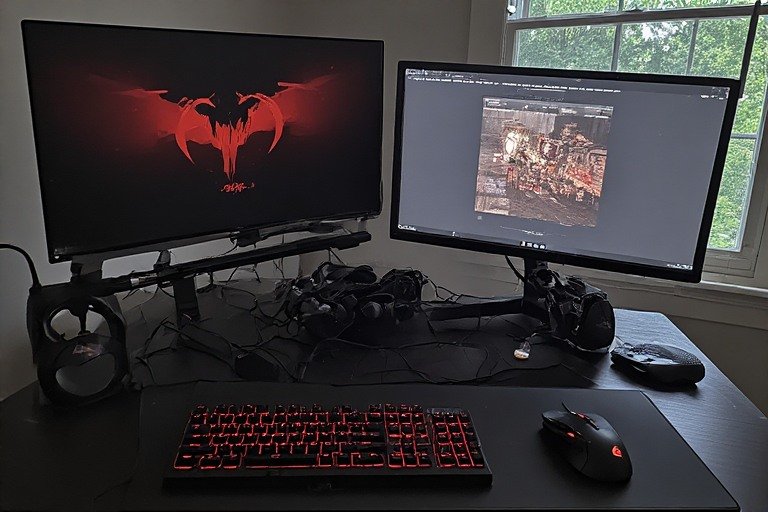
If your laptop doubles as both a work machine and gaming device, set it up to handle both. Use an external monitor, mechanical keyboard, and gaming mouse. The setup supports productivity during the day and switches to gaming mode after hours.
For gamers who work remotely, a quality gaming monitor (144Hz+) keeps both activities smooth. A gaming chair with ergonomic support handles long work sessions and long gaming sessions equally well. See our gaming desk setup ideas guide for performance-focused configurations.
- Gaming monitor 144Hz+ ($250–500)
- Mechanical keyboard ($80–150)
- Gaming mouse with high DPI ($30–80)
- Gaming chair with lumbar support ($200–400)
13. Laptop with Keyboard Tray Setup
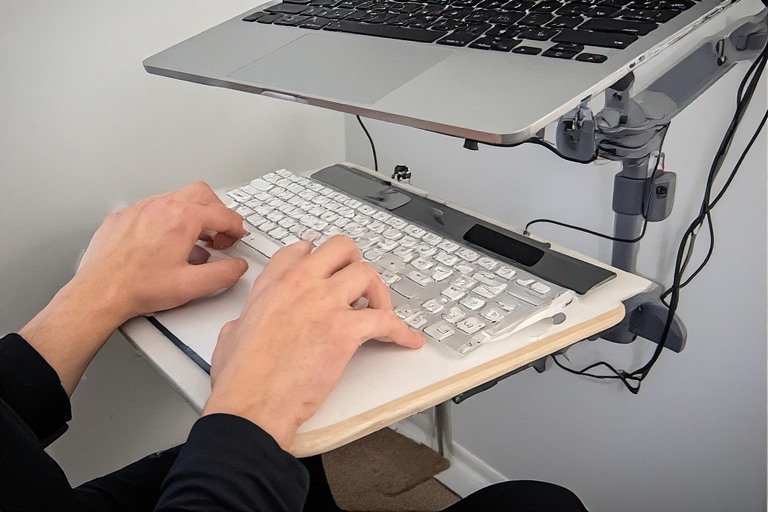
A keyboard tray mounted under your desk keeps your keyboard at the perfect height — elbows at 90°, wrists neutral. Your laptop sits on a monitor arm above, creating an ergonomic setup that prevents wrist and neck strain. This configuration is ideal for typists and coders who spend hours at the keyboard.
- Keyboard tray with mouse platform ($40–100)
- Articulating laptop monitor arm ($50–150)
- Ergonomic keyboard ($60–120)
- Wrist rest pad for comfort ($15–30)
14. Minimalist IKEA Laptop Setup
Build your laptop setup from IKEA’s affordable components: a simple desk, monitor stand, laptop riser, and cable management. This DIY approach costs $150–300 and looks intentional and clean. You control every element and can upgrade gradually.
IKEA desks are popular for remote workers because they are affordable, sturdy, and modular. Pair an IKEA desk with inexpensive accessories and you have a professional setup for less than competitors charge for a single monitor. See our IKEA desk setup ideas guide for the best combinations.
- IKEA Linnmon desk ($60–100)
- Laptop stand ($20–30)
- Monitor riser ($30–50)
- Cable ties and organizers ($10–20)
15. Professional Video Call Laptop Setup

If you are on video calls most of the day, position your laptop at eye level on a stand with good lighting directly in front. Your background should be professional but personalized. Consider a dedicated webcam for better quality than your laptop’s built-in camera.
A quality ring light or desk lamp positioned slightly above your camera reduces shadows and makes you look more professional on calls. A headset with a boom mic delivers far better audio than relying on your laptop’s built-in microphone.
- Laptop stand at eye level ($30–60)
- Ring light or professional desk lamp ($40–100)
- USB headset with boom mic ($60–150)
- External webcam if needed ($50–120)
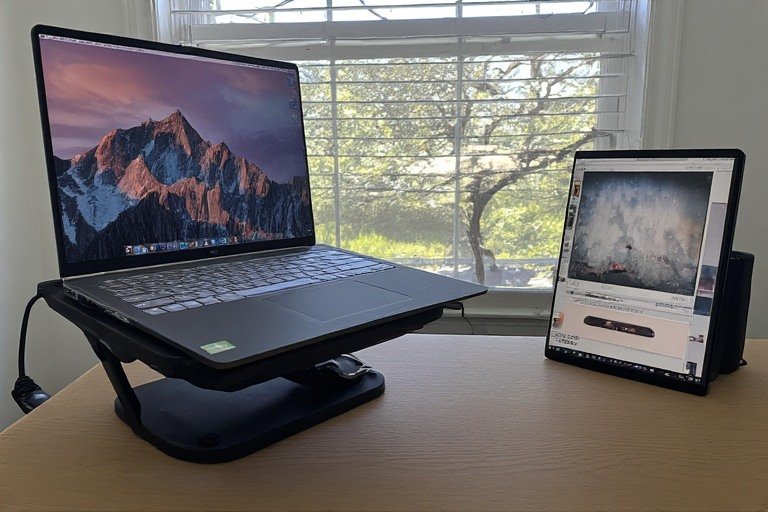
16. Laptop + Tablet Hybrid Setup
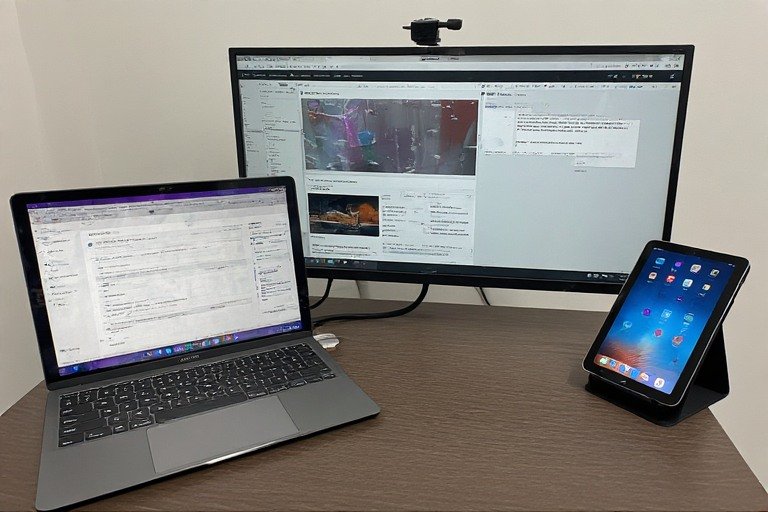
Use your laptop as the main device and an iPad or tablet as a secondary reference screen. Position the tablet on a stand next to your monitor for notes, video reference, or design assets. This three-screen setup (laptop + tablet + monitor) maximizes screen space without overwhelming your desk.
- Tablet stand ($20–40)
- Laptop on stand ($30–60)
- Single monitor or use laptop’s screen
- Wireless keyboard for comfortable typing
17. Travel-Ready Laptop Setup
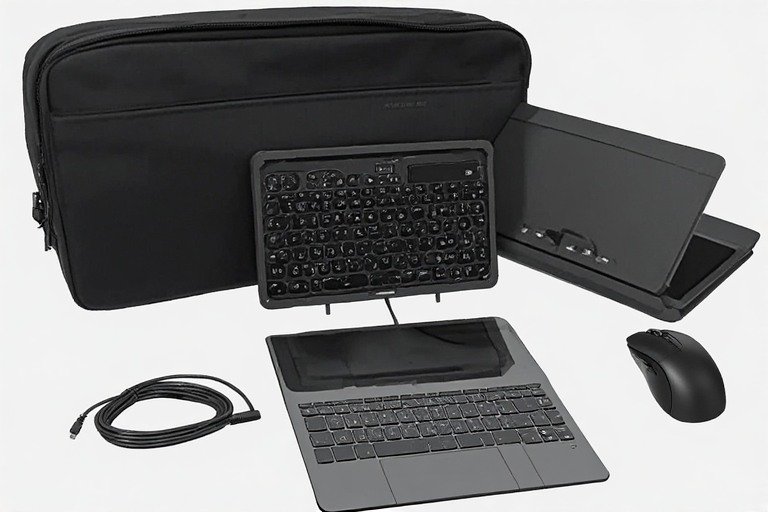
A portable laptop setup fits in a backpack: foldable stand, wireless keyboard, wireless mouse, and USB hub. Everything collapses flat and weighs under 5 lbs. This setup works in coffee shops, coworking spaces, Airbnbs, or anywhere you travel.
- Foldable portable laptop stand ($30–60)
- Compact wireless keyboard ($40–80)
- Portable mouse ($20–40)
- Optional: portable monitor ($200–400)
18. Cable-Free Wireless Laptop Setup
Go fully wireless: laptop on stand, wireless keyboard, wireless mouse, and wireless charging pad. All peripherals connect via Bluetooth or USB receivers. Cables only connect your laptop to power — no cable clutter, maximum mobility. Wireless setups look cleaner and let you rearrange easily.
- Wireless keyboard ($50–120)
- Wireless mouse ($30–80)
- Wireless charging pad ($20–50)
- Laptop stand with cable management ($40–80)
19. Laptop Setup with Pegboard Organization
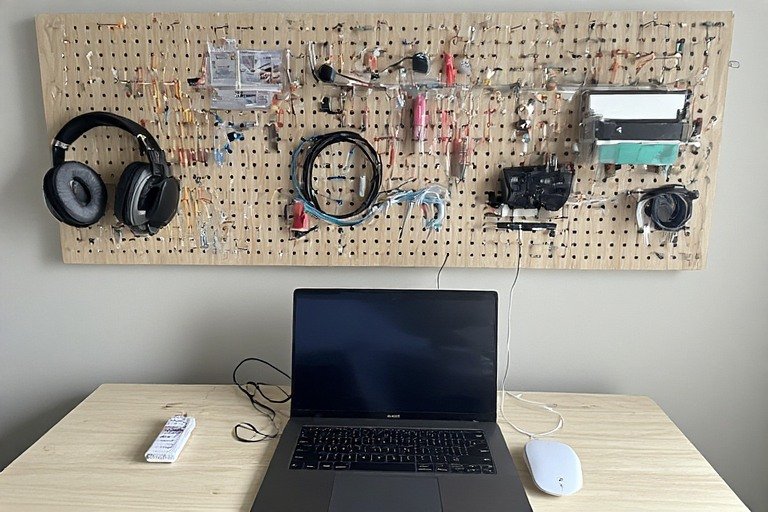
Install a pegboard above your desk to store frequently used items: headphones, cables, chargers, pens, notepads. Your desk surface stays clear because everything has a home on the pegboard. Pegboards are affordable ($20–40), customizable, and visually appealing — a well-organized pegboard becomes part of your setup’s beauty while keeping tools accessible.
- Pegboard panel ($20–40)
- Hooks and organizers ($15–30)
- Wall anchors appropriate for your wall type
- Mount at arm’s reach for convenient access
20. Laptop Setup with External Hard Drive + Cloud Backup
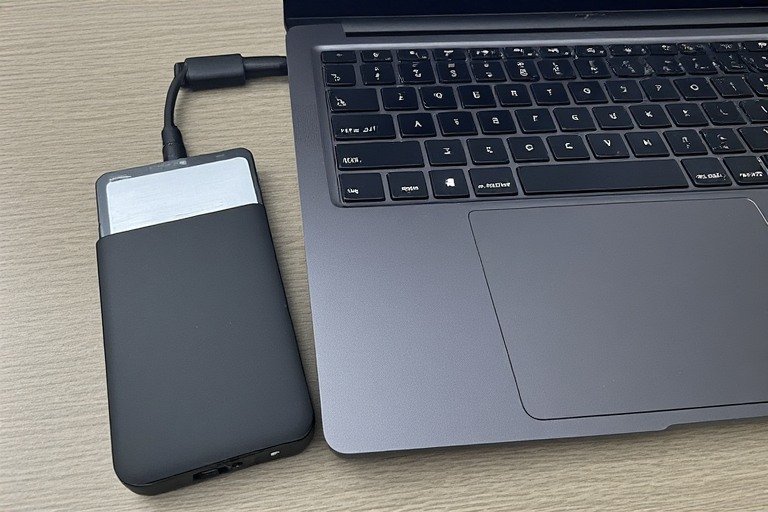
Organize your digital workspace alongside your physical setup. Keep an external hard drive on your desk for daily backups, paired with cloud backup for redundancy. A compact external drive ($50–150) sits neatly on your desk and backs up automatically. Add cloud services (Google Drive, Dropbox, OneDrive) for off-site backup.
- Portable external hard drive ($50–150)
- Cloud backup subscription ($10–15/month)
- USB hub to connect drive easily ($20–40)
- Cable organizer to keep cords neat ($15–25)
Laptop Desk Setup for Home Office
A laptop desk setup for home office has specific requirements that a student setup or travel setup does not. You need something that holds up for 8-hour days, looks professional on video calls, and separates work from home life visually. Here is how to approach it by room type.
Dedicated Room Home Office Laptop Setup
In a dedicated room, invest in a quality desk (47–60 inches wide), a docking station for one-cable simplicity, and an external monitor at eye level. A laptop stand beside the monitor creates a natural two-screen configuration without a second full monitor purchase. Cable management from desk to wall makes the space look finished and professional. Position the desk so you face the door — this is the most psychologically comfortable orientation for extended focus work. For the complete ergonomic setup guide, our ergonomic desk setup guide covers every adjustment.
Shared Space Home Office Laptop Setup
When your home office shares space with a living room or bedroom, a compact laptop desk setup with clear visual boundaries is essential. An L-shaped desk in a corner defines your workspace without consuming the whole room. A desk mat visually anchors the work zone. End-of-day reset — clearing the surface, closing the laptop — creates the psychological separation between work mode and home mode that prevents burnout.
Video Call-Optimized Home Office Laptop Setup
If your job involves frequent video calls, your laptop desk setup needs to account for lighting, background, and audio. Position your laptop stand so the camera is at eye level — not looking up at your face or down at your desk. Add a ring light or panel light positioned slightly above and in front of the camera to eliminate shadows. A clean, neutral background (bookshelf, plain wall, or simple art) appears professional without requiring a home makeover. A headset with a directional microphone is the single biggest audio upgrade you can make for under $80.
Budget Laptop Desk Setup: Cost by Tier
Budget Laptop Setup: Under $150
At this tier, the foundation is a $20–40 laptop stand, a $30–50 wireless keyboard, and a $15 under-desk cable tray. These three items fix the core ergonomic problem (neck angle), eliminate the main aesthetic issue (cable clutter), and define a proper work zone — all for under $100. Use your laptop screen only at this tier; an external monitor is the first upgrade when budget allows. An IKEA LINNMON desk ($60–80) in white or black provides a clean, wide surface if you need a new desk.
Mid-Range Laptop Setup: $150–$500
Add a 24–27″ external monitor ($180–300) on a monitor arm ($40–80) to your existing stand and keyboard setup. This is the most impactful single upgrade in any laptop desk setup — the jump from one small screen to a proper monitor at eye level transforms productivity and comfort simultaneously. A USB-C docking station ($50–100) consolidates all your connections to one cable. Total: $300–500 for a genuinely professional home office setup.
Premium Laptop Setup: $500+
At the premium tier, upgrade to a 27–32″ 4K monitor ($350–600), a motorized sit-stand desk ($400–700), and a Thunderbolt 4 dock ($150–250) for the fastest connection speeds. A quality ergonomic chair ($250–500) makes the full-day comfort investment that pays off in reduced back pain and sustained energy. This configuration handles any professional workflow and lasts 5+ years without needing significant upgrades.
Best Laptop Accessories for Desk Setups
The right accessories transform a basic laptop into a professional workstation. Here are the essentials every laptop user should consider:
Laptop Stand: The most important accessory. Raises your screen to eye level, eliminating neck strain. Choose between adjustable aluminum stands ($30–60) or fixed wood stands ($40–80). A quality stand supports your laptop securely and lasts years.
External Keyboard & Mouse: Separate input devices let you position the keyboard at the right height and keep your mouse close. Wireless options eliminate cable clutter. Budget $80–150 for quality peripherals that reduce repetitive strain injury.
Monitor Arm: If using an external monitor, an arm frees desk space and lets you adjust height, tilt, and rotation. VESA-compatible arms cost $40–150 and work with most monitors. A good arm reduces monitor glare and improves ergonomics significantly.
Docking Station: USB-C or Thunderbolt docks ($50–200) connect all peripherals with one cable. You undock your laptop in seconds for mobility, then dock again for a full workstation. Essential for hybrid workers who move between locations.
Desk Lamp: Good lighting reduces eye strain and improves mood. A task lamp ($30–80) with adjustable brightness and color temperature supports long work sessions. For comprehensive lighting and ergonomics guidance, our work from home desk setup guide goes deep on what actually matters.
Laptop Ergonomics: The Non-Negotiables
Laptop ergonomics is critical because laptops force a compromise: without external peripherals, you must choose between wrists up (neck down) or neck up (wrists down). Both cause pain over time. The solution is to decouple the screen from the keyboard with a stand and external keyboard. For the complete ergonomics checklist covering every adjustment from monitor height to chair lumbar support, see our dedicated ergonomic desk setup guide.
Screen height: Your monitor or laptop screen (on a stand) should be at eye level or slightly below — gaze angling 15–20° downward, not up or significantly down.
Keyboard and mouse: Elbows at 90°, wrists neutral (not bent up or down). This usually means the keyboard sits lower than the monitor — exactly why a stand plus external keyboard is the standard fix.
Monitor distance: An arm’s length away (20–30 inches). Close enough to read comfortably without moving your head to see the full screen.
Chair: Lumbar support, adjustable height, feet flat on the floor. Your chair is as important as your desk — budget $150–400 for one that lasts and prevents back pain.
Movement: Stand and stretch every hour. Even a perfect ergonomic setup cannot compensate for eight hours without movement. If you work full time from home, a sit-stand desk is one of the highest-value investments you can make.
How to Keep a Laptop Workspace Organized
Daily reset (2 minutes): At the end of each workday, clear your desk except for your monitor and lamp. Put everything back in its place. This 2-minute habit gives you a fresh start every morning and creates a mental signal that work is done.
Weekly cable audit (10 minutes): Check for disconnected cables, tangled cords, or creeping clutter. Use velcro ties to rebundle. Ensure your cable management system is still working. This prevents the slow drift toward chaos that happens in every workspace.
One-in-one-out: For every new item added to your desk area, remove one existing item. Small desks reach capacity quickly and invisibly — this rule keeps things intentional.
For a deeper dive into organization strategies, our clean desk setup ideas guide covers the habits and systems that keep workspaces functional long-term.
Frequently Asked Questions
What do I need for a good laptop desk setup?
The essentials are a laptop stand (raises the screen to eye level), an external keyboard and mouse (decouples input from screen height), and cable management. These three things solve the core ergonomic problem with laptops and cost under $150 total. Everything else — monitors, docking stations, lighting — is an upgrade on top of this foundation.
Should I use a laptop stand or monitor arm?
A laptop stand is the budget-friendly starting point — it raises your screen to eye level and costs $20–60. A monitor arm offers more flexibility (height, tilt, rotation, and the ability to push the screen out of the way) and costs $40–150. If you also use an external monitor, a monitor arm for that screen paired with a laptop stand for your laptop is the ideal combination.
What is the best desk for a laptop setup?
For most laptop setups, a desk 47–55 inches wide and at least 20 inches deep gives you enough room for a laptop stand, external keyboard, and mouse without feeling cramped. IKEA’s LAGKAPTEN and LINNMON are the most popular budget options. For a sit-stand upgrade, Flexispot and Autonomous offer compact frames starting around $300. See our IKEA desk setup ideas guide for specific build combinations.
How do I reduce cable clutter in a laptop setup?
A docking station is the most effective single fix — it reduces all your cables to one connection. Beyond that: velcro ties to bundle cables ($8), adhesive cable clips to route them to the back of the desk ($6), and an under-desk tray for your power strip ($20). These three items cost under $35 total and make a dramatic difference.
What is the best laptop desk setup for a home office?
The best laptop desk setup for a home office combines a 47–60″ wide desk, a docking station for one-cable simplicity, a 27″ external monitor on a monitor arm, and a laptop stand beside it for a natural two-screen layout. Add a quality ergonomic chair and an under-desk cable tray to complete the setup. Total cost for a professional home office laptop setup runs $400–700. For the full ergonomic positioning guide, see our ergonomic desk setup guide.
How do I set up a laptop desk for maximum productivity?
For maximum productivity, the three highest-impact changes are: adding an external monitor (more screen real estate reduces tab-switching and context-switching), using a docking station (one cable means you can sit down and be fully operational in seconds), and managing your cables completely (a clean desk reduces cognitive distraction measurably). After those three, the next biggest impact comes from ergonomics — a properly adjusted chair and monitor height prevents the fatigue that degrades focus over long sessions.
Ready to keep building? Browse our guides on minimalist desk setup ideas, aesthetic desk setup ideas, work from home desk setup, ergonomic desk setup, and our full desk setup ideas hub.