Meal Prep: Saving Time, Eating Healthy
and Reclaiming Your Week
The Sunday Scaries. We all know them. That creeping feeling of dread as the weekend winds down, not just because the work week is starting, but because of the looming question: “What are we going to eat this week?” For years, that question sent me into a spiral of stress, last-minute expensive takeout orders, and a fridge full of good intentions and wilted vegetables. My health suffered, my wallet was lighter, and my stress levels were through the roof.
Then I discovered meal prep. And I’m not talking about an Instagram-perfect fantasy of a thousand identical, bland chicken and broccoli containers. I’m talking about a real, sustainable system that transformed my relationship with food, time, and my own well-being.
This isn’t just another article with a few tips. This is my comprehensive blueprint, built on years of personal experience, trial-and-error, and deep research into nutrition and food science. I’ll guide you through the Why, the How, and the What of meal prepping. We will cover everything from the foundational philosophy to the nitty-gritty of storage and food safety, all to empower you to build a system that works for your life.
Let’s trade that weekly dinner dread for a sense of calm, control, and delicious, healthy food waiting for you.
The “Why”: More Than Just Food in a Box
Before we dive into the chopping and cooking, it’s crucial to understand the core philosophy. Meal prepping isn’t about restricting yourself; it’s about liberating yourself. It’s a proactive approach to your life and health.
My Personal Journey: From Takeout Chaos to Kitchen Control
For a long time, my evenings looked like this: get home from work, exhausted. Open the fridge, stare blankly. Close the fridge. Open a food delivery app. Order something greasy and expensive. Feel a pang of guilt, both for my health and my bank account. Repeat. I was caught in a reactive cycle.
My “aha” moment came when I calculated I was spending over $600 a month on takeout for just myself. It was a shocking figure. I decided something had to change. My first few meal prep attempts were clumsy. I made a giant batch of the same bland chili and was sick of it by Tuesday. I bought the wrong containers, and my salads turned into a soggy mess.
But I persisted. I started small, just prepping my lunches. Then I added breakfasts. Slowly, I built a system. I learned which foods hold up well, how to create variety, and the magic of a “component prep” strategy (more on that later). Today, a 2-hour session on Sunday sets me up for a week of stress-free, healthy meals. That initial investment of time pays me back tenfold throughout the week in saved time, mental energy, and a profound sense of well-being. This guide is everything I wish I had known when I started.
The Triple Crown of Benefits: Time, Health, and Money
Let’s break down the tangible benefits you can expect.
-
Time Reclaimed: Think about the time you spend each day deciding what to eat, prepping ingredients, cooking, and cleaning up. It can easily add up to 60-90 minutes per evening. By batching this process into one dedicated session, you’re essentially “front-loading” your work. You cook once to eat five times. This frees up your weeknights for relaxing, hobbies, or spending time with family.
-
Health in Your Hands: When you’re tired and hungry, you’re more likely to reach for high-calorie, low-nutrient convenience foods. Meal prepping removes willpower from the equation. When a perfectly portioned, healthy meal is the easiest option available, you’re going to choose it. You control every ingredient—the amount of salt, the type of oil, the portion size of your protein and carbs. This level of control is fundamental for achieving any health goal, whether it’s weight management, muscle gain, or simply feeling more energetic. As a study from the International Journal of Behavioral Nutrition and Physical Activity has shown, meal planning is consistently linked to a healthier diet and less obesity.
-
A Fatter Wallet: As my own story proves, the savings are substantial. You buy ingredients in bulk, which is cheaper. You use up the food you buy, dramatically reducing food waste. A homemade grain bowl with chicken and veggies might cost $3-4 to make, while its restaurant equivalent could easily be $15 or more. The savings compound week after week.
The Meal Prep Blueprint: A Step-by-Step Guide for Success
Ready to get started? Let’s break down the process into manageable steps. Don’t try to do everything at once. Pick a “Prep Day”—for most, it’s Sunday—and dedicate a 2-3 hour block.
Step 1: The Plan – Your Culinary Roadmap
This is the most critical step. Never go into a prep session without a plan.
-
Assess Your Week: Look at your calendar. Do you have a late night at work on Tuesday? A lunch meeting on Thursday? Plan your prepped meals around your actual schedule.
-
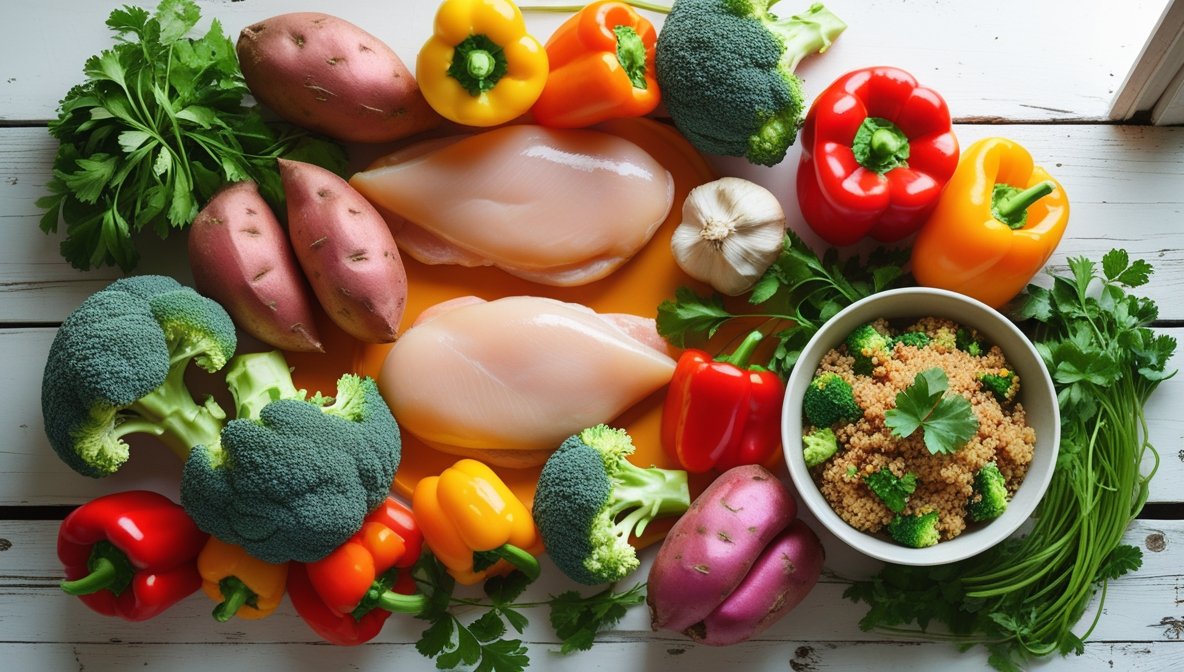
Choose a Theme or Formula: To avoid getting overwhelmed, start with a simple formula. The most versatile is the “Protein + Carb + Veggie” formula. For example, your plan might look like this:
-
Protein: Grilled Chicken Breast
-
Carbohydrate: Roasted Sweet Potatoes & Quinoa
-
Vegetables: Steamed Broccoli & Roasted Bell Peppers
-
-
Write It Down: Create a simple shopping list based on your chosen meals. Check your pantry and fridge first to avoid buying duplicates.
Step 2: The Shop – Navigate the Grocery Store Like a Pro
With your list in hand, shopping becomes a targeted mission, not a wandering chore.
-
Stick to the Perimeter: The outer aisles of the grocery store are typically where you’ll find whole foods: produce, meat, and dairy. Spend most of your time here.
-
Buy in Bulk: Items like quinoa, brown rice, oats, and lentils are significantly cheaper when purchased from bulk bins or in larger bags.
-
Choose “Sturdy” Produce: For weekly prep, select vegetables that hold up well after being cooked and refrigerated. Great options include broccoli, cauliflower, carrots, bell peppers, sweet potatoes, and green beans. More delicate greens like spinach are best added fresh.
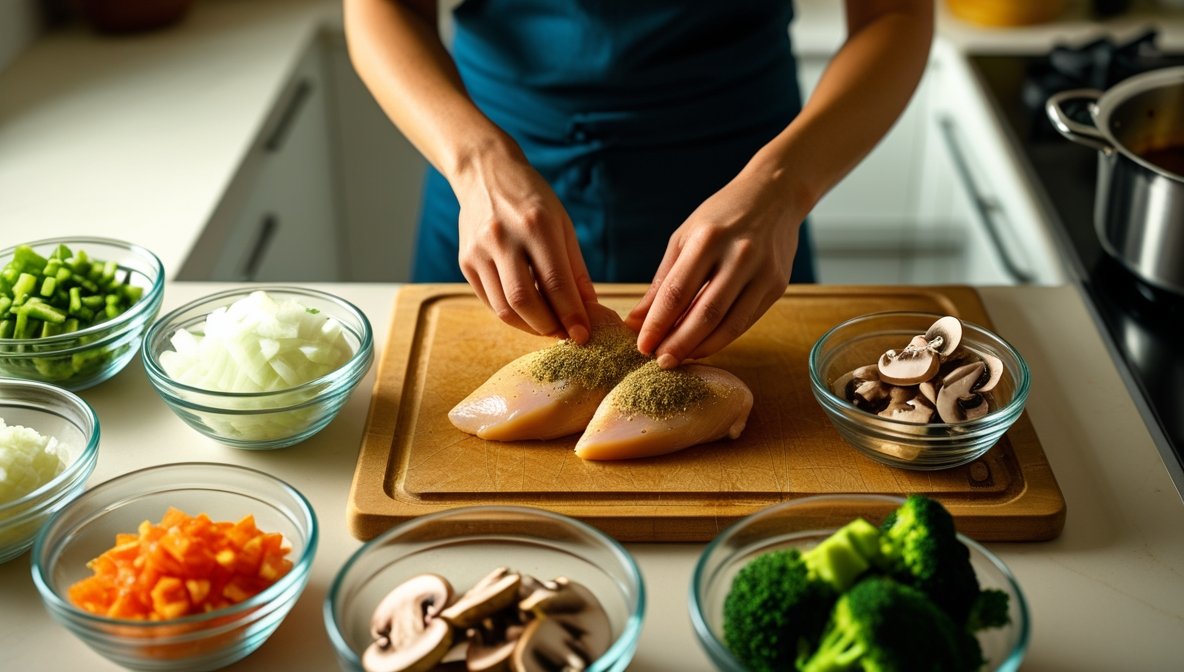
Step 3: The Prep – Your “Mise en Place”
“Mise en place” is a French culinary term meaning “everything in its place.” Before you turn on a single burner, get all your components ready. This is a game-changer for efficiency.
-
Wash and Chop: Wash all your produce at once. Then, chop, dice, and slice everything you need for the week. Store chopped veggies in airtight containers or reusable silicone bags.
-
Make Marinades and Sauces: Whisk together any marinades or salad dressings you’ll be using. A simple lemon-herb vinaigrette can elevate any meal.
Step 4: The Cook – Batching for Maximum Efficiency
Now it’s time to cook. The key is to multitask.
-
Preheat Your Oven: The oven is your best friend for hands-off cooking. Get your sweet potatoes, chicken, and other veggies roasting on sheet pans.
-
Use Your Stovetop: While things are in the oven, cook your grains (quinoa, rice) or simmer a soup on the stovetop.
-
Leverage Appliances: If you have a slow cooker or an Instant Pot, use it! It’s perfect for cooking shredded chicken, chili, or large batches of lentils while your oven and stove are occupied.
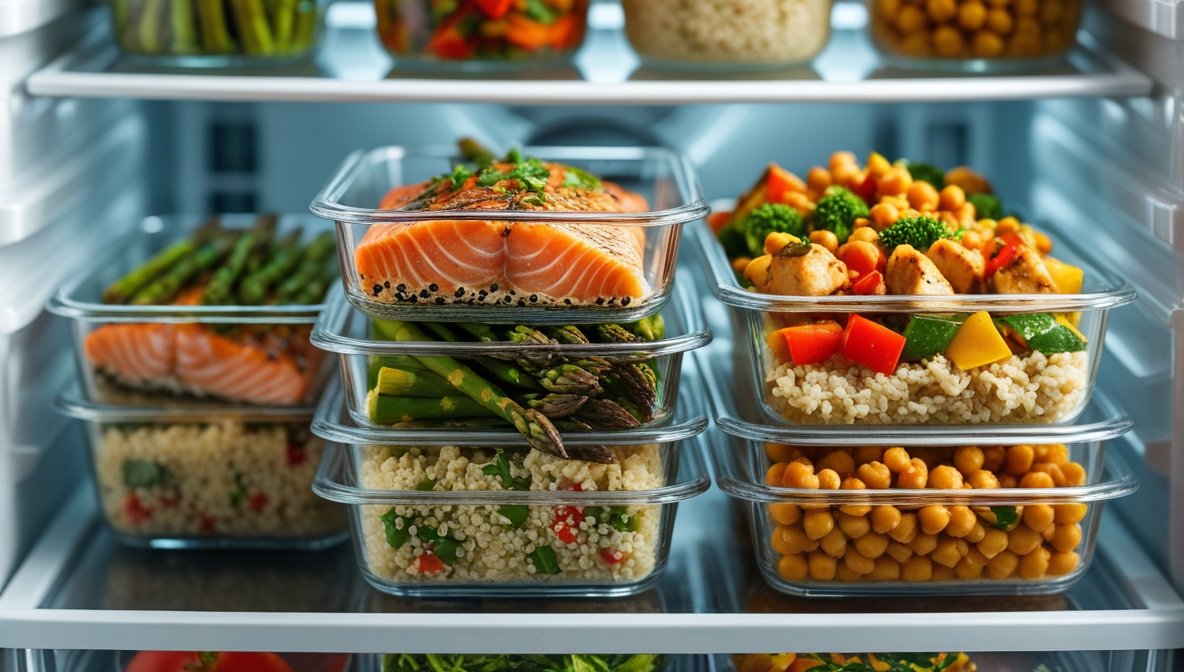
Step 5: The Portion & Store – Setting Up Your Future Self
Once everything is cooked, let it cool completely before packing. This is a crucial food safety step to prevent bacterial growth.
-
Component Prep vs. Plated Meals:
-
Plated Meals: Assemble full meals in individual containers. This is the ultimate “grab-and-go” solution.
-
Component Prep: Store each cooked component (chicken, quinoa, veggies) in its own large container. This offers more flexibility, allowing you to “build a bowl” differently each day to prevent flavor fatigue. I personally prefer a hybrid model: I assemble 2-3 plated meals and keep the rest as components.
-
-
Label and Date: Use masking tape and a sharpie to label each container with its contents and the date it was made. Your future self will thank you.
The Meal Prepper’s Toolkit: My Expert-Vetted Essentials
You don’t need a lot of fancy gadgets, but a few key pieces of equipment make a world of difference.
-
High-Quality Containers: This is my #1 recommendation. Invest in a set of glass containers with airtight locking lids. Glass doesn’t stain or retain odors, is microwave and oven-safe (without the lid!), and is better for the environment.
-
A Sharp Chef’s Knife: A good knife makes chopping faster, safer, and more enjoyable. Keep it sharp!
-
Large Baking Sheets: You’ll need at least two large, heavy-duty sheet pans for roasting vegetables and proteins.
-
A Food Scale: For consistent portions and accurate nutrition tracking, a simple digital food scale is invaluable.
-
A Rice Cooker or Instant Pot: These appliances cook perfect grains and proteins with minimal supervision, freeing you up to focus on other tasks.
Foolproof Recipes and Formulas: Building Your Repertoire
Here are some of my go-to, battle-tested recipes and formulas to get you started.
The Ultimate Sheet Pan Formula
This is the easiest way to start meal prepping.
-
Formula: 1-2 lbs Protein + 4-5 cups Sturdy Veggies + 2-3 tbsp Oil + Seasoning
-
Example: Lemon Herb Chicken and Veggies
-
Ingredients: 1.5 lbs boneless, skinless chicken breast, 1 large head of broccoli (cut into florets), 2 bell peppers (sliced), 1 red onion (cut into wedges), 2 tbsp olive oil, 1 tsp dried oregano, 1 tsp garlic powder, salt, pepper, 1 lemon.
-
Instructions:
-
Preheat oven to 400°F (200°C).
-
On a large baking sheet, toss the broccoli, peppers, and onion with olive oil, oregano, garlic powder, salt, and pepper.
-
Nestle the chicken breasts among the vegetables. Season the chicken with the same spices.
-
Roast for 20-25 minutes, or until the chicken is cooked through (165°F internal temperature) and the vegetables are tender-crisp.
-
Squeeze the juice of half a lemon over everything before serving.
-
-
The “Build-a-Bowl” Bar
This is based on the component prep method. Prepare each of these and store them separately.
-
Base (Choose 1-2): Quinoa, brown rice, farro, mixed greens.
-
Protein (Choose 1-2): Shredded chicken (made in a slow cooker), hard-boiled eggs, canned chickpeas (rinsed), baked tofu.
-
Veggies (Choose 3-4): Roasted sweet potatoes, steamed green beans, cherry tomatoes, sliced cucumbers, roasted cauliflower.
-
Healthy Fat (Choose 1): Sliced avocado (add daily), a sprinkle of seeds (pumpkin, sunflower), or a drizzle of olive oil.
-
Flavor Boost (Choose 1): A scoop of hummus, a sprinkle of feta cheese, a dollop of Greek yogurt, or a healthy dressing.
The Effortless Breakfast: Overnight Oats
-
Formula: 1/2 cup Rolled Oats + 1/2 cup Milk (dairy or non-dairy) + 1 tbsp Chia Seeds + 1 tbsp Maple Syrup/Honey (optional) + Toppings
-
Instructions:
-
In a mason jar or container, combine oats, milk, chia seeds, and sweetener.
-
Stir well, seal, and refrigerate overnight.
-
In the morning, top with your favorites: berries, nuts, seeds, or a spoonful of nut butter. Make 3-4 jars at a time for the week ahead.
-
Trustworthiness in the Kitchen: Non-Negotiable Food Safety
This is where expertise and trustworthiness are paramount. Preparing food in advance is perfectly safe, but you must follow proper food safety protocols. Skimping on these rules can put you at risk for foodborne illness.
-
The 2-Hour Rule: Do not leave cooked food at room temperature for more than two hours. Bacteria multiply rapidly in the “danger zone” (40°F – 140°F or 4°C – 60°C).
-
Cool Food Rapidly: To get food cooled quickly, you can divide large batches into smaller, shallow containers. You can also place a container of hot food in an ice bath in your sink for a few minutes before refrigerating.
-
Storage Lifespan: Most cooked meals will last safely for 3-4 days in the refrigerator. If you prep for more than 4 days, freeze the later meals.
-
Reheating Thoroughly: When reheating food, make sure it reaches an internal temperature of 165°F (74°C) to kill any potential bacteria. Stir food midway through microwaving for even heating.
-
Trust Your Senses: If something looks or smells “off,” do not eat it. When in doubt, throw it out.
For more detailed guidelines, I always refer to the experts. The USDA’s Food Safety and Inspection Service is an excellent resource for any questions about safe food handling.
Overcoming Common Hurdles: Troubleshooting Your Prep
You will encounter challenges. Here’s how to overcome the most common ones.
-
“I get bored of eating the same thing!”
-
Solution: Embrace component prep! Also, use sauces and toppings to change the flavor profile. The same chicken and rice can feel like a new meal with a splash of teriyaki sauce one day and a dollop of tzatziki the next.
-
-
“I don’t have a huge block of time on Sunday!”
-
Solution: Split it up. Do your shopping on Saturday. Do all your chopping Saturday night while watching a movie. Then, the cooking on Sunday will be much faster. You can also do a “mini-prep” mid-week to refresh your components.
-
-
“My food gets soggy.”
-
Solution: Store sauces and dressings separately and add them just before eating. For salads, place the dressing at the bottom of the jar, followed by hardier ingredients, and put the delicate greens on top.
-
Your Journey Begins Now
We’ve covered the philosophy, the practical steps, the gear, the recipes, and the critical safety rules. The mountain of information might seem daunting, but remember: you don’t have to go from zero to one hundred overnight.
Meal prep is a practice, not a performance. It’s a skill you build over time.
My challenge to you is this: start small. Don’t try to prep 21 meals for the entire week. This week, just prep your lunches. Or choose one recipe from this guide and make enough for three days.
Experience the small win of opening your fridge on a busy Tuesday to find a delicious, healthy lunch waiting for you. Feel the stress melt away. Once you feel that, you’ll be hooked. You’ll have taken the first, most important step toward reclaiming your time, taking control of your health, and finally ending the dreaded “what’s for dinner” dilemma for good. Welcome to the club.
About the Author
This guide was written by a passionate home cook and certified nutrition coach with over a decade of hands-on meal prep experience. After transforming their own health and finances through strategic meal planning, they have dedicated themselves to helping others build sustainable, stress-free habits in the kitchen. The advice provided here is a combination of personal experience, client feedback, and evidence-based nutritional and food safety principles.