Cooking Dry Aged Steak: Tips for Perfection
Imagine savoring a perfectly cooked steak, its rich flavor and tender texture elevating your dining experience to new heights. Dry aged beef represents the pinnacle of steak enjoyment, offering a depth of taste and tenderness that regular steaks can’t match. The process of dry aging concentrates the flavors and naturally tenderizes the beef, creating a product that requires specific cooking techniques to unlock its full potential.
Cooking dry aged steak is an art that demands attention to detail and a understanding of its unique characteristics, such as lower moisture content, which affects the cooking time and method. Mastering the techniques to cook it to perfection is essential to justify its premium price point and appreciate why it commands such respect among chefs and steak enthusiasts.
Key Takeaways
- Understanding the unique qualities of dry aged beef is crucial for cooking it to perfection.
- The dry aging process enhances flavor and tenderness.
- Specific cooking techniques are required due to its lower moisture content.
- Mastering these techniques elevates the dining experience.
- Dry aged steak demands attention to detail in cooking time and method.
Understanding Dry Aged Steak: What Makes It Special
For those who appreciate a rich, intense beef flavor, dry aged steak is a game-changer. Dry aged steak undergoes a unique aging process that concentrates its flavor and tenderizes the meat.
The Dry Aging Process Explained
The dry aging process involves allowing the steak to sit in a controlled environment, where it loses moisture and develops a more complex flavor profile. During this time, natural enzymes break down the proteins and fats, resulting in a tender and more flavorful product. Up to 30% of the steak’s weight can be lost in water during this process, which is crucial to remember when cooking.
Flavor and Texture Differences from Regular Steak
Dry aged steak has several distinct differences from regular steak. The flavor becomes nutty, earthy, and buttery, with some longer-aged cuts tasting similar to fine blue cheese. The texture also becomes remarkably tender as the natural enzymes break down tough muscle fibers and connective tissues. Compared to regular steaks, dry aged steaks have less moisture, which means they cook faster.
| Characteristics | Dry Aged Steak | Regular Steak |
|---|---|---|
| Moisture Content | Less moisture | More moisture |
| Cooking Time | Cooks faster (about 30% less time) | Cooks longer |
| Flavor Profile | Nutty, earthy, buttery | Milder flavor |
Selecting the Perfect Dry Aged Steak
Selecting a high-quality dry-aged steak is the first step towards a culinary masterpiece. To make an informed choice, you need to understand what makes a dry-aged steak exceptional.
Quality Indicators to Look For
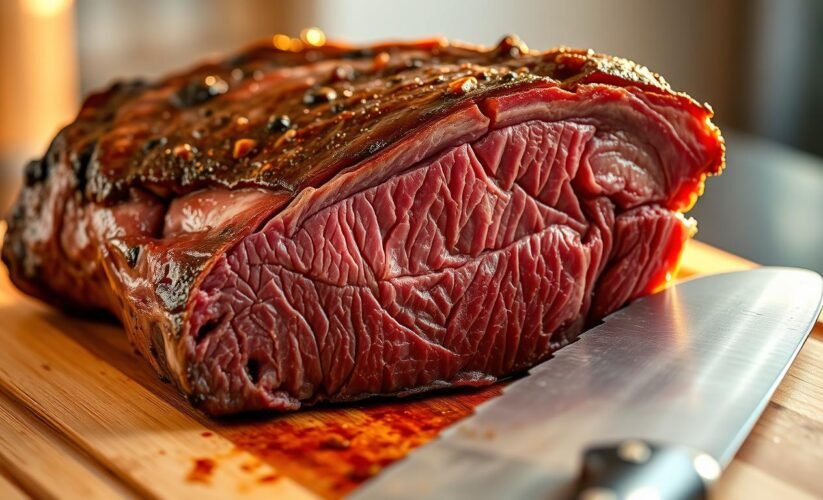
When choosing a dry-aged steak, look for visible marbling, as it enhances the flavor and tenderness. The steak should have a rich, deep red color and a firm texture. The aging process contributes significantly to the steak’s quality, so it’s essential to check the aging time. Typically, a dry-aging time of 21-28 days is considered optimal for most consumers.
Popular Cuts for Dry Aging
Some of the most popular cuts for dry aging include the Ribeye and New York Strip. These cuts are favored for their marbling and rich flavor profile, which are enhanced by the dry-aging process. The result is a more complex and intense flavor experience.
Optimal Aging Time
The aging time significantly impacts the steak’s flavor profile. While 15 days is standard, steaks aged for 21+ days have a deeper flavor. Options include:
- Aging for 14-21 days for mild enhancement
- 21-28 days for a balanced dry-aged taste
- 30-45 days for pronounced dry-aged characteristics
- Beyond 45 days for intense, funky flavors
The optimalagedepends on personal preference, with longertimeresulting in more complex profiles.
Essential Preparation Steps Before Cooking
Preparing your dry-aged steak properly is the first step towards a culinary masterpiece. Before you start cooking, there are several essential steps to ensure your steak is cooked to perfection.
Properly Thawing Your Steak
If your dry-aged steak is frozen, it’s crucial to thaw it properly. Thawing in the refrigerator is the safest method, allowing for a slow and even thaw. This helps preserve the steak’s texture and prevents bacterial growth.
Bringing to Room Temperature
Once thawed, bring your steak to room temperature before cooking. This step ensures that the steak cooks more evenly. Remove the steak from the refrigerator and let it sit at room temperature for about 30-45 minutes before cooking.
Patting Dry for the Perfect Sear
Pat both sides of your steaks with a paper towel to remove excess moisture from the surface. Then, season generously with kosher salt pepper. Removing excess moisture is crucial for achieving a perfect sear, as it allows for the Maillard reaction to occur, creating complex flavors.
- Thoroughly pat your dry-aged steak with paper towels.
- Season with kosher salt and freshly ground black pepper just before cooking.
- For thicker cuts, consider seasoning the edges as well.
A properly dried and seasoned steak will react immediately when it hits the hot cooking surface, beginning the browning process.
| Preparation Step | Purpose |
|---|---|
| Proper Thawing | Preserves texture and prevents bacterial growth |
| Bringing to Room Temperature | Ensures even cooking |
| Patting Dry | Removes excess moisture for a perfect sear |

Best Way to Cook Dry Aged Steak
When it comes to cooking dry aged steak, the method you choose can make all the difference in achieving a tender and flavorful result. The key is to select a cooking technique that complements the steak’s unique characteristics.
Pan-Searing Method
Pan-searing is a popular method for cooking dry aged steak as it allows for a crispy crust to form on the outside while keeping the inside juicy. To pan-sear, heat a skillet over high heat, add a small amount of oil, and sear the steak for 2-3 minutes per side. Finish with a compound butter or herb-infused oil for added flavor.
Grilling Technique
Grilling dry aged steak over direct heat can achieve a nice char on the outside while maintaining the tenderness within. Preheat your grill to high heat, season the steak, and grill for 4-5 minutes per side, or until it reaches your desired level of doneness. Let it rest before slicing.
Sous Vide Approach
The sous vide method involves sealing the steak in a vacuum-sealed bag and cooking it in a water bath at a precisely controlled temperature. This ensures a consistent doneness throughout the steak. For medium-rare, cook at 129-134°F (54-56°C) for 1-3 hours. Finish with a quick sear in a hot skillet or with a torch to develop a crust.
The sous vide approach offers unparalleled control and consistency, making it ideal for cooking premium dry aged steaks. By combining sous vide with a high-heat finish, you achieve both tender, evenly cooked meat and a flavorful crust.
Achieving Steakhouse-Quality Results at Home
To achieve steakhouse-quality dry aged steak at home, it’s essential to master a few key techniques. The journey to a perfectly cooked dry aged steak involves understanding its unique characteristics and applying precise cooking methods.
Mastering the Perfect Sear
A perfect sear is crucial for locking in the flavors and textures of dry aged steak. To achieve this, ensure your pan is hot before adding the steak, and don’t overcrowd it. Use a skillet that can retain high heat, such as cast iron, and add a small amount of oil with a high smoke point. The Maillard reaction, a chemical reaction between amino acids and reducing sugars, occurs when you sear the steak, enhancing its flavor and appearance.
Using Aromatics and Compound Butters
Aromatics and compound butters can elevate the flavor of your dry aged steak. Aromatics like garlic, thyme, and rosemary can be added to the pan during the cooking process to infuse the steak with their flavors. Compound butters, made by mixing softened butter with herbs, spices, or other flavorings, can be melted over the steak just before serving, adding a rich and complex flavor profile.
Temperature Control and Timing
Precise temperature control is critical when cooking dry aged steak. Because it has less moisture than regular steak, it cooks faster. Use an instant-read thermometer to monitor the internal temperature. For medium-rare, aim for 130-135°F, considering the temperature will rise during resting. Timing is also crucial; dry aged steaks can quickly go from perfectly cooked to overdone. Remove the steak from heat when it’s 5°F below your target temperature to account for carryover cooking.
By mastering these techniques, you’ll be able to achieve a steakhouse-quality dry aged steak at home, enhancing your cooking experience and impressing your guests with your culinary skills.
Finishing Touches for an Exceptional Steak Experience
The art of cooking dry-aged steak doesn’t end with cooking; it’s the finishing touches that make all the difference. To achieve a truly exceptional steak experience at home, you need to focus on the details that elevate your dish from excellent to extraordinary.
One crucial step is allowing your steak to rest for 5-10 rest minutes after cooking. This allows the juices to redistribute, ensuring that each bite is tender and full of flavor. When you’re ready to serve, slice the steak against the grain to maximize tenderness, especially for larger cuts like ribeye or strip steaks.
To add an extra layer of flavor, consider reheating the pan drippings with aromatics like shallots, garlic, and herbs, and pour them over your steak just before serving. A light sprinkle of flaky salt and a grind of pepper can enhance the flavor and texture. By paying attention to these finishing touches, you can create a steakhouse-quality experience in the comfort of your own home, enjoying a premium dining experience without the hefty price tag.
With practice and attention to detail, you’ll master the art of cooking dry-aged steak and impress your guests with your culinary skills.